A1.1 Installation and configuration - LUPMISManual
Main menu:
Annex 1: LUPMIS Set-Up
Level of expertise required for this Chapter: Expert; specifically for LUPMIS @ TCPD
For system requirements see Annex 1.1.11 below, for hardware requirements see Annex 1.4. The 'Installation CD' is explained in Annex 11.
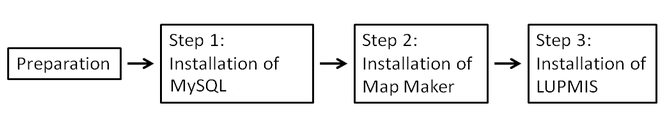
Installation summary:
- LUPMIS installation runs in 3 steps. On a new computer, run all 3 steps as administrator.
- Boot between each step.
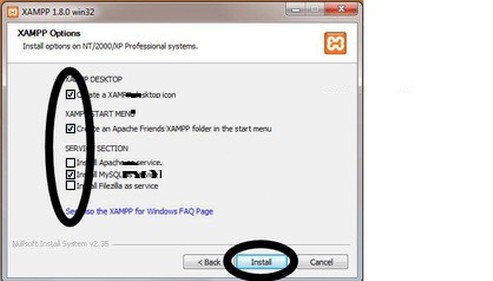
- For the xampp installation (step 1), at 'XAMPP Options' check to 'Install MySQL as service'
- After the Map Maker installation (step 2), register Map Maker as a full license.
- - - - -
There are 3 installation versions of LUPMIS :
- Standard installation with full LUPMIS software, Map Maker, xampp/MySQL, Manual, utility and support software, Ghana data for a full installation (1 file lupmis _ installation.exe, some 900 MB)
- Same with full report set (3-4 GB)
- 'LUPMIS core ' for minor updates (only if recently a full version was installed ), without support software, Manual, data (lupmis.exe, some 100 MB)
LUPMIS Tools can refer to the LUPMIS database either as stand-alone (on virtual server) or on a LAN or WAN or Internet (servers). The reference can be choosen anytime when LUPMIS is started. This installation chapter describes the process to install LUPMIS Tools and its support software on a stand-alone or on a LAN server.
A1.1 Full Installation and Configuration
Target to run LUPMIS like any other information system is to:
Enable all TCPD offices to work in a structured way,
Have coordinated and synchronized activities following national standards,
Share and exchange experiences,
Enable technology transfer and training and
Give each other technical assistance.
It is therefore recommended that all TCPD offices working with GIS / LUPMIS have a standardized, identical LUPMIS and Map Maker configuration.
Initialization files have been created to ease the set-up of LUPMIS. Request these files from TCPD-HQ-GIS Section.
The following description is for Windows 7 (very similar for Windows 8, Vista, XP). The installation has to be done in 'real' administrator mode. After installation, LUPMIS can be run in any user account. Similarly, updates can be done from any user account later. Check first, if your system is virus-protected (see Annex 20.4).
A 1.1.1 Installation
The installation is a 4-step process:
Step 0 (Preparation):
Step 0.1: Open the computer in real administrator mode, not as part of the administrators group.
If you are the sole user, under one account established on the computer, you are not running the system as full administrator. Action: Windows 'Start' > At 'Search Programs and Files', type: Command Prompt > Right-click mouse button: Run as administrator >
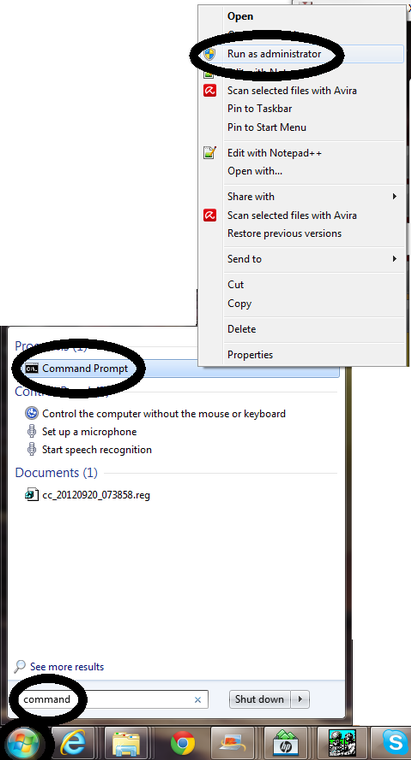
> In the black 'Administrator....' window, type: Net user administrator /active:yes > Enter
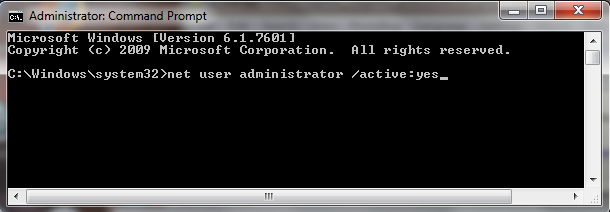
A message will confirm, that the operation was successful ('The command completed successfully').
Windows 8: Desktop > Screen corner > Search > Type: CMD > Right-mouse > Run as administrator > Possibly, enter administrator password > and continue as described above.
Step 0.2: Reboot (Restart) and log in to the new real administrator account.
Windows 8: Click on user account name > administrator
Step 0.3: If you have set up a real administrator account as in step 0.1 above: Set password protection as follows: Windows 'Start' > Control Panel > User Accounts > Change your Windows password > Create a password for your account
Step 0.4: If you have previously installed (or attempted to install) xampp or Apache, it might be possible, that MySQL is running as services. This is ok.
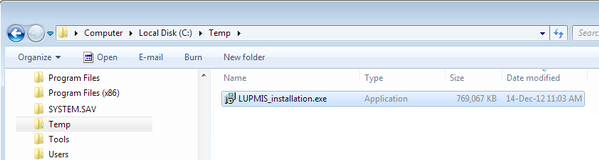
Step 0.5: Copy the file lupmis_installation.exe to your system, e.g. to your folder C:\Temp.
Step 0 is now complete.
- - - - -
Step 1:
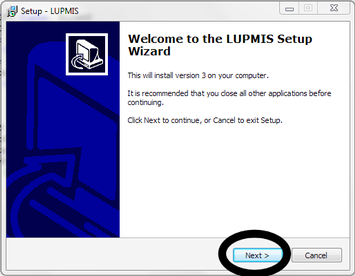
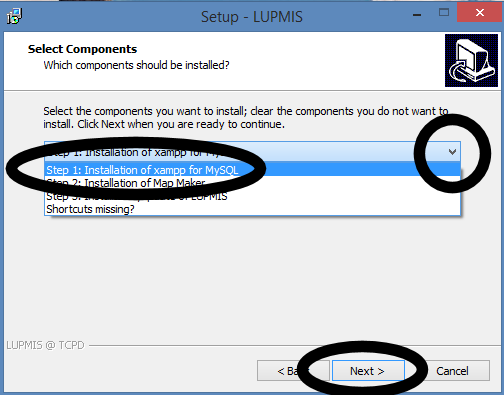
Step 1.1: Install xampp with MySQL: Run lupmis_installation.exe (e.g. from C:\Temp) > (It might take a few minutes, before it fires up) > Next > Select 'Step 1: Installation of xampp for MySQL' > Next
For users outside LUPMIS:
To install xampp, run the installation file downloaded from xampp homepage (As of October 2012, best experience with xampp-win32-1.8.0-VC9-installer.exe).
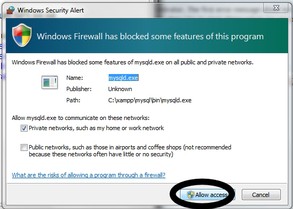
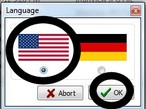
According to your security and firewall settings, following menu might ask to allow access:
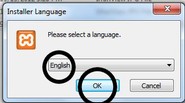
> English > OK >
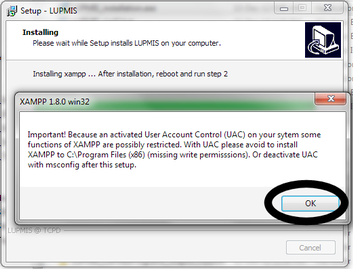
According to your Windows version, a warning has to be approved: OK
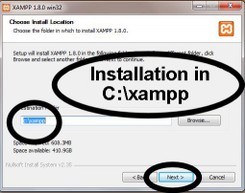
> Next >
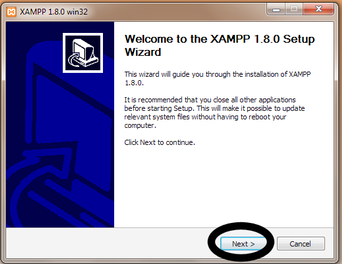
> Next >
Installation as 'Service': By default, the top 2 options are ticked, while the bottom 3 options are unticked. If you like, that MySQL is always running, tick also the box 'Install MySQL services', otherwise you can start MySQL every time you start LUPMIS (see step 3 of Application, A 1.1.2).
> Install >
This will run a few minutes:
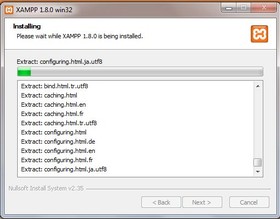
> No > OK >
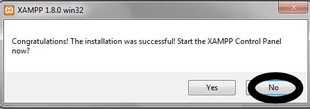
If the xampp control panel pops up, you can close it.
Step 1.2: Reboot (Restart) and log in again as real administrator.
(Step 1 is now complete).
- - - - -
Step 2:
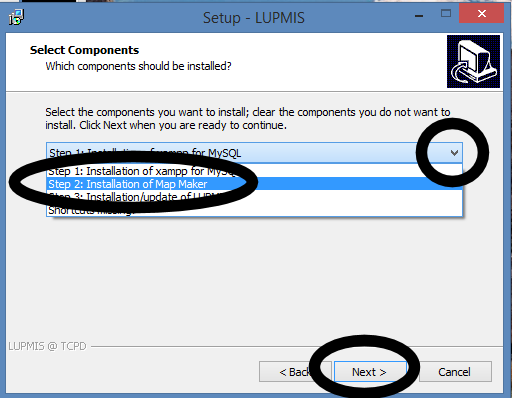
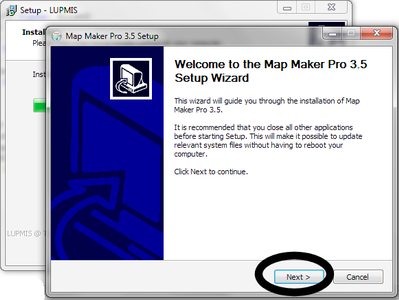
Step 2.1: Install Map Maker: Run again lupmis_installation.exe (e.g. from C:\Temp) > Next > Select 'Step 2: Installation of Map Maker' > Next
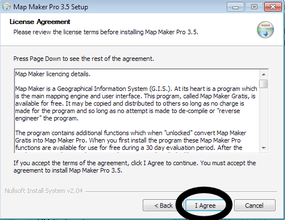
A few menus for the actual Map Maker installation will pop up. Follow the screen instructions to proceed.
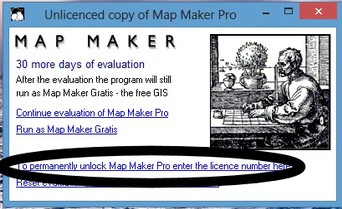
After step 2.1, Map Maker is installed. If you now run Map Maper for the first time, it is recommended to register your license: To permanently unlock Map Maker Pro, enter the licence number here > Enter your user name and licence key, procured from Map Maker

Step 2.2: Reboot (Restart) and log in again as administrator.
(Step 2 is now complete).
- - - - -
Step 3:
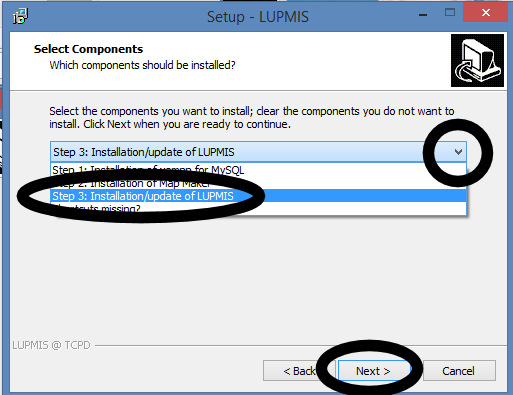
Step 3.1: Install LUPMIS and base data: Run again lupmis_installation.exe (e.g. from C:\Temp) > Next > Select 'Step 3: Installation / update of LUPMIS' > Next
Optional step 3.2: If you have the Supplement LUPMIS DVD of LUPMIS Reports, copy all folders to your C:\LUPMIS\LUPMISReports folder. This contains all documents (reports) for land use planning in Ghana, which form part of the LUPMIS archive.
Step 3.3: It is recommended to close the administrator mode, which you opened in step 0.1 (above) in a very similar way.
Action: Windows 'Start' > At 'Search Programs and Files', type: Command Prompt > Right-click mouse button: Run as administrator > (see screenshot under step 0.1)
> In the black 'Administrator....' window, type: Net user administrator /active:no > Enter
A message will confirm, that the operation was successful ('The command completed successfully').
Step 3.4: Reboot
Step 3.5: It is strongly recommended to set up your user account display in Windows:
Set the date format to dd/MMM/yy (Windows 'Start' > Control Panel > Clock, language, and region > Change the date, time, or number format > Customize the format > Daate > Short date: dd-MMM-yy > Long date: dd MMMM, yyyy > OK > Apply > OK > Ok) and:
Enable the show of extensions in Windows Explorer (in Windows Explorer > Alt on keyboard > Tools > Folder options > View > Untick: Hide extensions for known file types > Apply > Apply to Folders > OK).
- - - - -
- - - - -
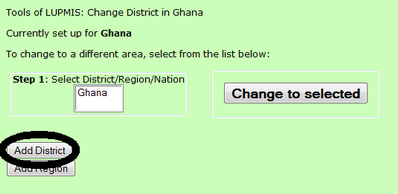
Running LUPMIS the first time, base data will be loaded and you will be asked to register an administrator account and to define your home District:
- The first user ('installer') has by default the right of a local administrator. He has to register with his user name and his password. He is authorized to register other users as specific users (with full permissions, for data entry, or data retrieval for planning or for revenue tasks) or as other local administrators.
The local administrator(s) can delete a user account, but can not see or reset a user password. This can be done only by the individual user. If a user forgets his/her password, the account has to be deleted and re-created. If the sole local administrator forgot his/her password, a key file has to be sent to HQ for re-configuration.
- Then:

- Wait, till the full opening screen appears under the menu bar appears (might take 2 or 3 minutes):

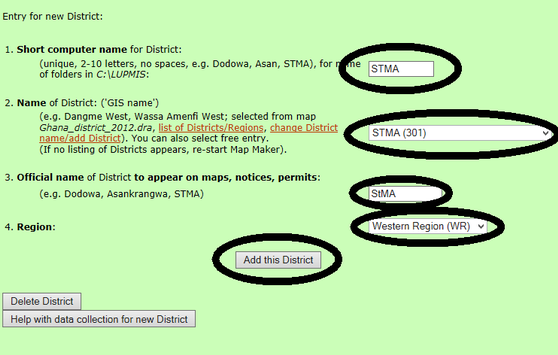
- For the definition of your home District, follow the screen instructions, for example:
- - - - -
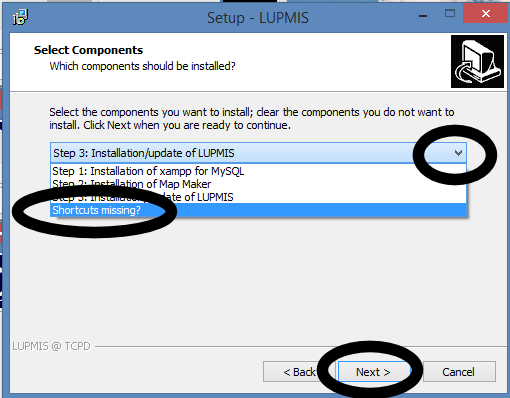
Technical note 2: If there are no shortcuts on the desktop, create yourself. (At Desktop: Right-mouse > New > Shortcut).
- Xampp, refer to C:\xampp\xampp-control.exe
- LUPMIS Tools, refer to http://localhost/ (or http://localhost/index.php),
- with icon from C:\LUPMIS\LUPMISPrograms\GISUtilities\LUPMISicon.ico
- LUPMIS Manual, refer to C:\LUPMIS\LUPMISManual\index.html,
- with icon from C:\LUPMIS\LUPMISPrograms\GISUtilities\LUPMISmanualicon.ico
- Map Maker, refer to C:\Map Maker\MMM.exe
Technical note 3 for shortcuts and tiles at Windows 8:
- If icon is missing: Right-mouse click on shortcut > Properties > Security > Select user account > Tick all permissions to allow > ... > Change icon > Browse > to folder C:\LUPMIS\LUPMISPrograms\GISUtilities
- If you have LUPMIS Tools and LUPMIS Manual as apps, but not as tiles: Pin to start
- - - - -
A 1.1.2 Additional Software
For full functionality of LUPMIS, it is recommended to install following additional programs:
7-Zip
IrfanView
GPS driver (gpsu*setup.exe)
Teigha file converter
Acrobat reader (or other pdf reader)
These programs are freeware and, after LUPMIS installation, available in folder C:\LUPMIS\LUPMISPrograms\GISUtilities. See Annex 11 for content of LUPMIS-installation, also Chapter 7 for brief description of utilities.
Word or open-source alternative to read doc/docx files
Excel or open-source alternative to read xls/xlsx files
Google Earth (requires internet connection, latest version can be downloaded from earth.google.com/download-earth.html, no need for Pro version)
AntiVir (no direct link to LUPMIS, but virus protection is necessary)
Skype can be installed, but do not activate port 80 as reserve port (Tools > Options > Advanced > Connections > Un-tick 'Use port 80 as alternatives...'
A 1.1.3 Manual Set-up of Map Maker
Following description is only for technical documentation. It can be seen as an alternative method only in exceptional cases.
1. Preparation: Download the latest version of Map Maker from www.mapmaker.com or request it from TCPD-HQ / LUPMIS. Be sure, that you also have the latest version of MMmacro.exe (June 09 or more recent). Have the LUPMIS distribution CD ready (see Annex 11, also online available).
2. Display:
Main menu > File > System set up > Preferences > Set up window: Preferences > Start up > Start up banner: ButtTCPD.jpg (if provided by the Project), all others boxes unchecked >
(Main menu > File > System set up > Preferences >) Set up window: Preferences > Screen > Untick ‘Clean screen’ > Tick ‘Show tool bar icons’ > Tick ‘Use on-screen layer manager’ > Tick ‘Use Windows file picker’ > Tick ‘Show scale bar’ > Tick ‘Show clock on menu bar’ > Untick ‘Hide scroll bar’ > Untick ‘No exit’ > Tick ‘Fast menu’ > Untick ‘UK OS coordinates’ > Tick ‘Show Lat/Long coordinates’ > Untick ‘solid white symbols’ >
(Main menu > File > System set up > Preferences >) Set up window: Tool column > Available tools: With the Add, Move up, Move down buttons you create following list on the right side (custom tool bar):
Pan by dragging, Zoom to box, Tape measure, Data query, divider, divider, divider, Polygon, Line, Symbol, Text, divider, divider, divider, Cutter, Join, Snap, divider, divider, divider, Edit Object, Select > OK
3. Units:
Main menu > File > System set up > Preferences > Set up window: Preferences > Miscellaneous: Date format: day / month / year > Tick ‘Assume Lat/Long if in range’ > Untick all other boxes >
(Main menu > File > System set up > Preferences >) Set up window: Units and scales > metres / 0 / hectares / 1 / mms / mms / LongLat in decimal degrees > OK
4. Editing Mode:
Check following boxes (on):
Main menu > Edit > Live layer data > Use live data
Main menu > Edit > Live layer data > Initialize live layer data
Main menu > Edit > Live layer options > all
5. Projection (UTM 30):
Main menu > Utilities > Latitude and Longitude utilities > Create projection > Edit projection window: Projection name: Write ‘UTM 30’ > Projection system > Universal Transverse Mercator (UTM) > UTM zone 30 > OK
Main menu > Utilities > Latitude and Longitude utilities > Edit projection > Choose map projection window: Delete all existing projections, except ‘UTM 30’ > OK
Main menu > File > System set up > Preferences > Set up window: Default projection > Projection system > Universal Transverse Mercator (UTM) > UTM zone 30 > OK
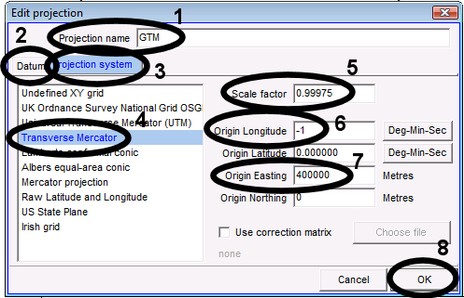
6. Alternative projection (GTM: Ghana Transverse Meractor):
Main menu > Utilities > Latitude and Longitude utilities > Create projection > Edit projection window: Projection name: GTM [see below: 1] > Datum [2]: WGS 84 Global > Projection system [3] > Transverse Mercator [4] > Scale factor: 0.99975 [5] > Origin Longitude: -1 [6] > Origin Latitude: 0.00000 > Origin Easting: 400000 [7] > Origin Northing: 0 > OK [8)
7. If you work with data in the obsolete Ghana Grid projection (‘War Office’), you have to enter the definition of the Ghana Grid:
Main menu > Utilities > Latitude and Longitude utilities > Datums > Create datum > Edit datum window: Create ellipsoid > Edit ellipsoid window: Name: War Office, Semi-axis Major: 6378300, Flattening 1/: 296, with 6356751…. appearing in the Semi-axis Minor window > OK > Edit datum window: Name: Accra (War Office) in m > Location: Ghana, Geoccentric shift relative to WGS84: dx: -196.24 > dy: 33.38 > dz: 322.76 > Use Molondenski parameters: da: -163 > df x 10000:
-0.25567 > OK
Main menu > Utilities > Latitude and Longitude utilities > Create projection > Edit projection window: Projection name: Ghana Grid > Projection system > Transverse Mercator > Scale factor: 0.99975 > Origin Longitude: -1 > Origin Latitude: 4.66666666 > Origin Easting: 274320 > Origin Northing: 0 > OK
Main menu > Utilities > Latitude and Longitude utilities > Edit projection > Choose map projection window: Select Ghana Grid > OK > Edit projection window > Datum > Accra (War Office) in m: Ghana > OK
See also Annex 8 for different projection definitions.
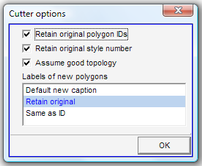
8. Cutter Options
Main menu > Edit > Live layer options > Cutter options > Cutter options window: All three boxes should be ticked > Labels of new polygons: Retain original > OK
See Chapters 2.7 to split lines, 2.8 to split polygons, 2.13 to extend polygons, which are relevant for the cutter options.
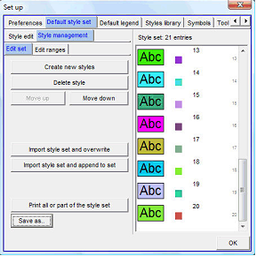
9. Style Sets
Request preconfigured style files from HQ and copy them to folder C:\Map Maker\Configuration\Style library.
9.1 Check: Main menu > File > System set up > Styles library > Set up window: Styles library > Check under Library style sets, if all preconfigured LUPMIS styles are already installed.
If not, continue with: Import style set > Select folder Map Maker --> Library > Style file > OK and repeat this process for all styles libraries.
9.2 For the default style: Main menu > File > System set up > Preferences > Set up window: Default style set > Style management > Import style set and overwrite > Choose style set window: Default (If Default is not listed: Browse > Select folder Map Maker --> Library > Default.stl > Open) > OK
10. Templates
Request preconfigured template files from HQ and copy them to folder C:\LUPMIS\LUPMISPrograms\Templates.
- - - - -
A1.1.4 Fast installation of Map Maker
If you want to run Map Maker without the specific settings for LUPMIS, you can have a basic installation of Map Maker. With this installation, do not expect to run Map Maker with all the options and procedures as explained in this Manual.
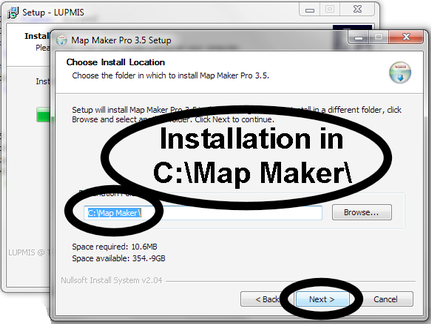
Install Map Maper to the default folder C:\Map Maker by double-click on the Map Maker file (mmzip.exe) and follow the instructions on screen.
Start running Map Maker > Unlicenced copy of Map Maker Pro window: To permanently unlock Map Maker Pro enter the licence number here > Map Maker Pro licence window: Enter your registered user name > Enter your licence number (both of them are provided by HQ) > OK > Licenced copy of Map Maker Pro window
Map Maker should be configured to work in UTM 30 projection:
Main menu > Utilities > Latitude and Longitude utilities > Create projection > Edit projection window: Projection name: Write ‘UTM 30’ > Projection system > Universal Transverse Mercator (UTM) > UTM zone 30 > OK
Main menu > Utilities > Latitude and Longitude utilities > Edit projection > Choose map projection window: Delete all existing projections, except ‘UTM 30’ > OK
Main menu > File > System set up > Preferences > Set up window: Default projection > Projection system > Universal Transverse Mercator (UTM) > UTM zone 30 > OK
A1.1.5 System requirements of LUPMIS
Minimum system requirements of running Map Maker are very small (512 kB RAM, 20 MB of free harddisk space, with Windows XP, Vista, 7 or 8).
To run LUPMIS without major problems and in a multitasking environment, it is recommended to have 2 GB RAM, at least 10 GB of originally free harddisk space (depending on the amount and type of data), and to have Windows Vista or 7 or 8 installed.
A1.1.6 Uninstall Map Maker
To uninstall Map Maker, you have to:
Use the Uninstall option of Map Maker, or through the Control Panel, then
Delete all remaining folders:
C:\Map Maker
C:\Users\(current account name)\AppData\Map Maker (in Vista) or C:\Documents and Settings\(current account name)\Application Data\Map Maker (in XP), then
Delete all entries in the registry (with regedit from Window’s run command)
A1.1.7 Install District logo
You should have your District's logo appear on all maps, permits, revenue Demand Notices and site plans: Resize your logo to size of 472 x 472 pixels and save it in following formats and locations:
As BMP file District_logo_xxxx.bmp (where xxx = name of your District, as installed in LUPMIS, e.g. District_logo_Dodowa.bmp) in folder C:\ LUPMIS \ LUPMISPrograms \ GraphicSupport
As JPG file District_logo_xxxx.jpg (e.g. District_logo_Dodowa.jpg) in the same folder C:\ LUPMIS \ LUPMISPrograms \ GraphicSupport ,
As transparent GIF file District_logo_xxxx.gif (e.g. District_logo_Dodowa.gif) in folder C:\ xampp \ htdocs \ lupmis \ img.
If you want a signature to appear at the Demand Notices, scan and copy it to JPG file Signature_dir_xxxx.jpg (where xxx = computer name of District, e.g. Signature_dir_Dodowa.jpg) in folder C:\ LUPMIS \ xxx \ xxx rev \ Tools (e.g. C:\ LUPMIS \ Dodowa \ Dodowa rev \ Tools), recommended resolution of 472 x 472 pixels.